Attach-To-Me for VRChat manual
About this prefab
This prefab implements a versatile system for attaching props to avatars in VRChat. Players can attach props to either themselves or others. This allows for, for example, helping place accessories on a friend in places where it would be awkward or hard to see to do so yourself.
Position tracking is done locally, ensuring that there is no lag when tracking the underlying bones.
In-world usage: Desktop
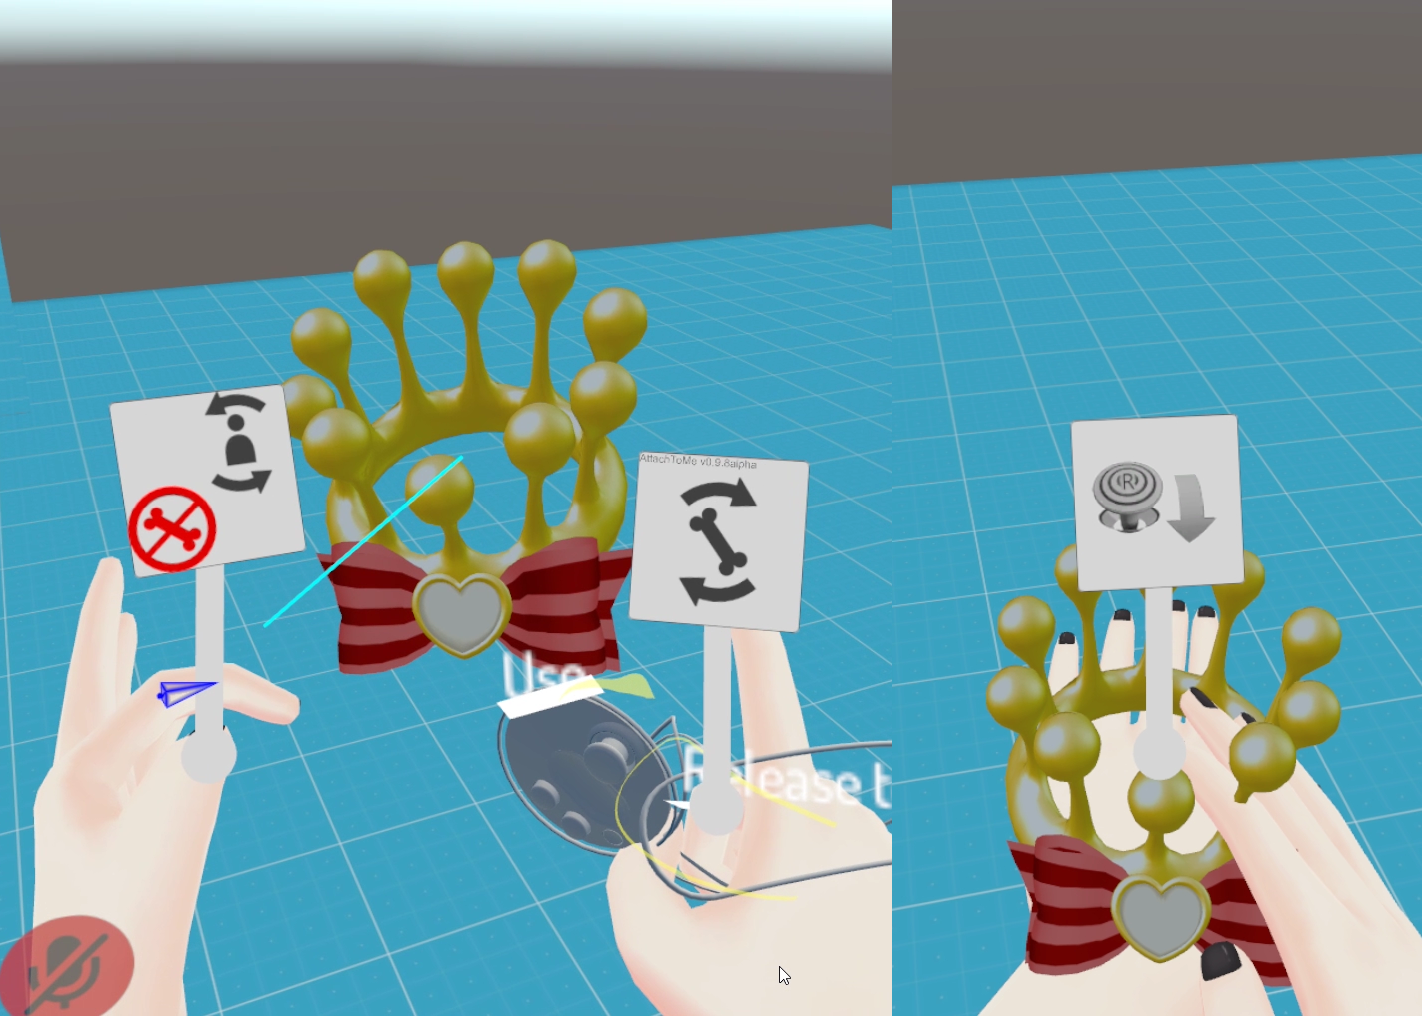
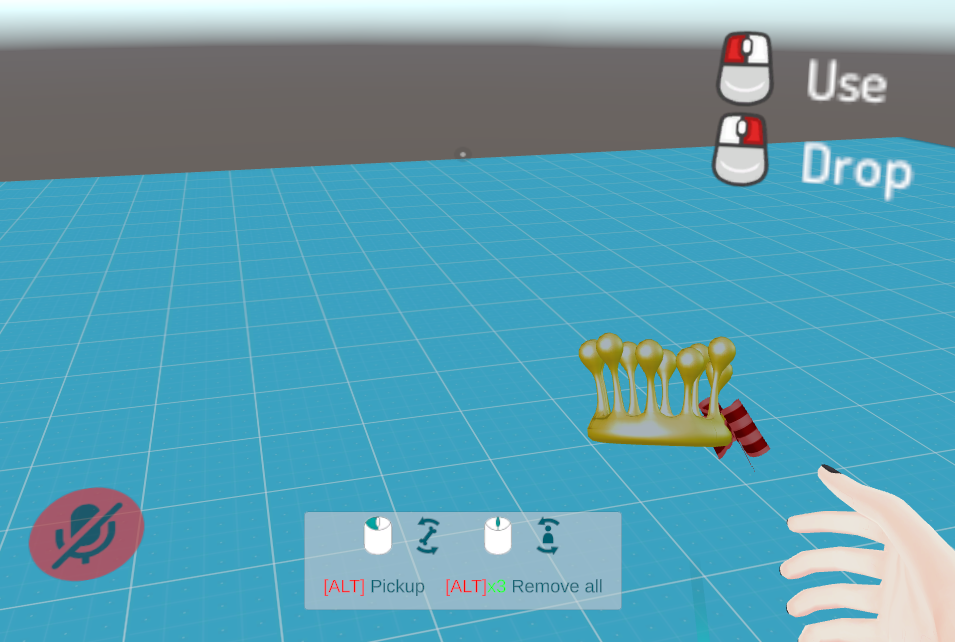
After picking up a prop, a usage quick-reference will be shown on-screen. Players can place the prop where they want, then use left mouse button to select the bone to track, or middle mouse button to cycle which player to track.
Once attached, props will no longer be pickupable. Players can press the left ALT key once to enable pickup briefly, or press it three times to remove all props tracking themselves. Picking up a prop does not stop tracking (this can be used to efficiently make small adjustments to placement); to stop tracking, press the middle mouse button while holding the prop, or move far enough away that the bone is no longer shown in green, then drop the prop.
In-world usage: VR
After picking up a prop, position it where you want it to stick. The bone that it will track will initially be shown in blue; pull the trigger on the hand holding the prop to lock it to the shown bone (which will then be shown in green). If you want to select a different bone, pull the trigger again to cycle targets. You can also pull the trigger on your other hand to cycle target players.
Once placed, the prop will stop being pickupable (this is to avoid props on your hand being constantly pickupable). To pick them up again, pull down on your right trigger (on Vive controllers, press down on the trackpad).
To stop tracking, while holding the prop, pull the trigger on the hand which is not holding the prop.
Bone displays
Bones will be shown in different colors depending on the tracking state:
- Blue: The bone is not being tracked, but will be the one selected when you pull the trigger
- Green: The bone will be tracked when you drop the prop.
- Red: The bone is too far away; if you drop the prop, tracking will be cancelled.
[example images]
Usage (world authors)
Installation
Install the following packages, in order:
- VRCSDK3-Worlds
- UdonSharp (version 0.20.1 or higher)
- VRC Attach-To-Me
Per-prop setup
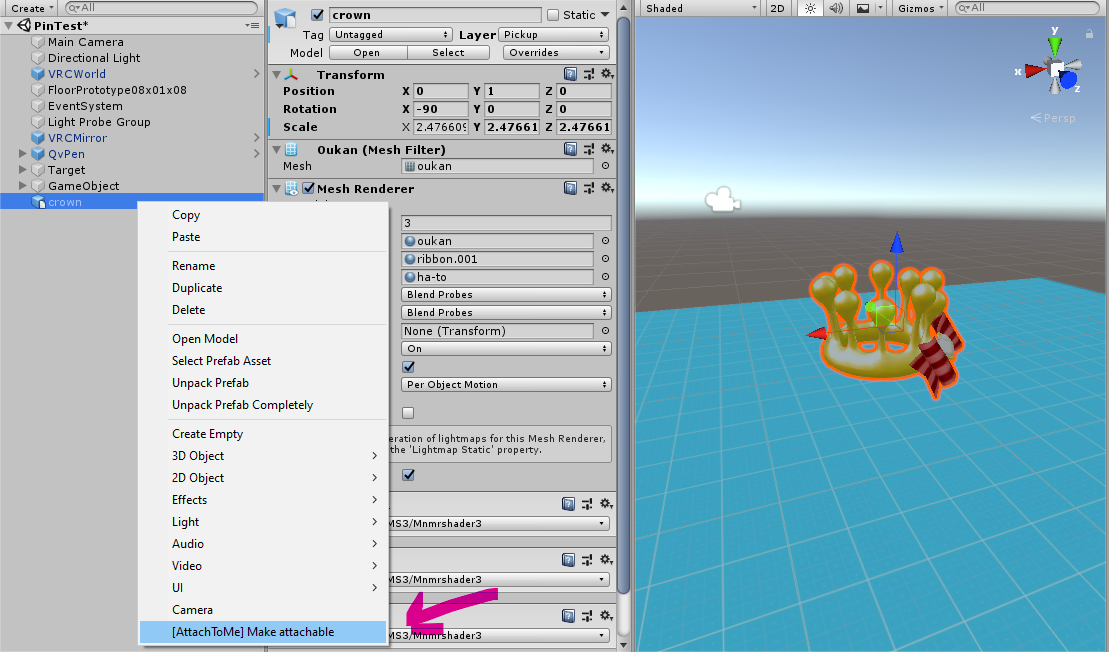
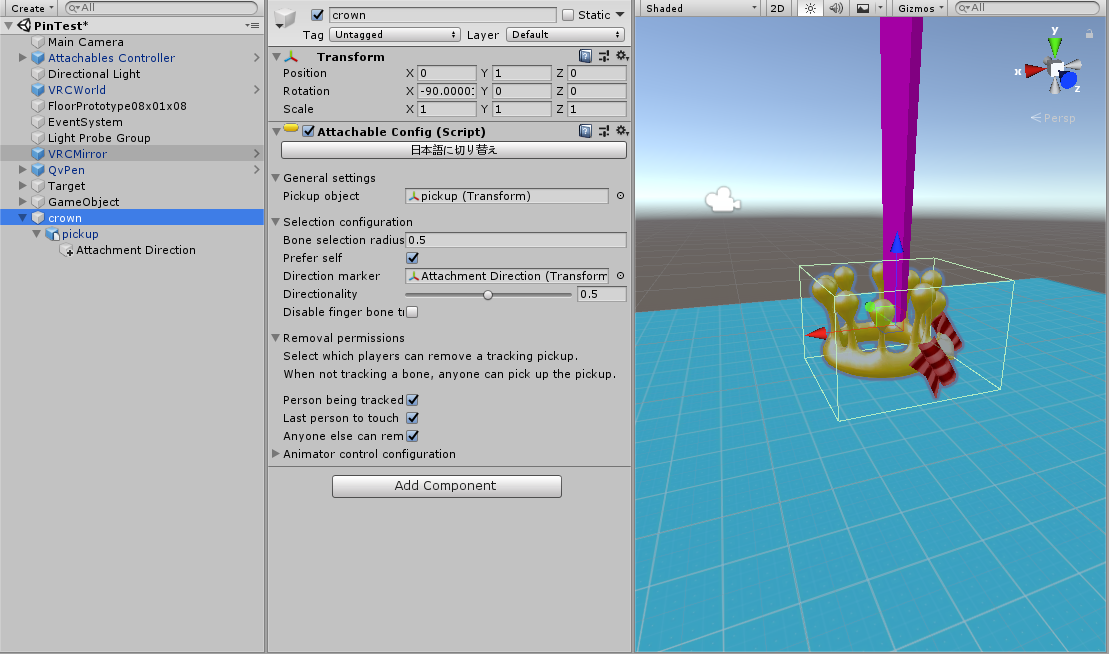
To make a prop attachable, right click it in the Hierarchy, and select the [AttachToMe] Make Attachable option. This will automatically configure most options. Your original object will be moved to the pickup child of a new parent object (which keeps the name of the original object).
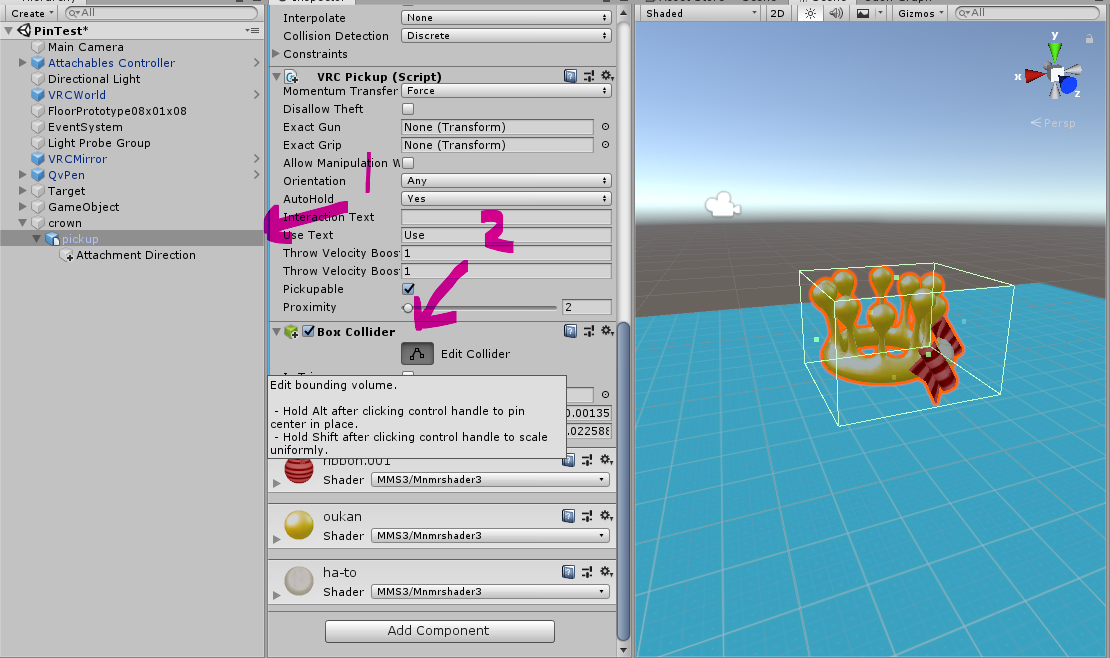
Verify that the collider on the pickup child of the object has the collider bounds set properly. This will usually happen automatically if the object you started with had a MeshRenderer on it. Otherwise, adjust the range manually.
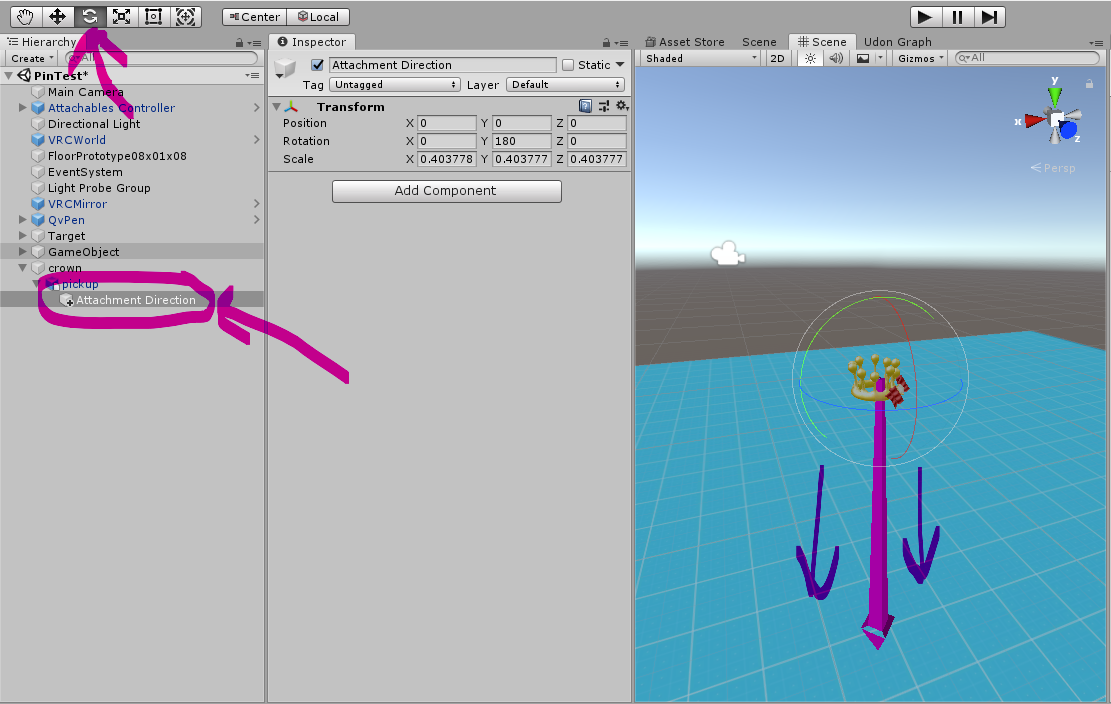
Ensure the Z axis of the Attachment Direction object under the pickup points in the direction you expect the object to be attached to. When the root object or the direction object is selected, a large arrow will indicate this direction; the length of the arrow indicates the maximum range at which bones can be attached to.
Note that Attachable components support editing with multiple objects selected.
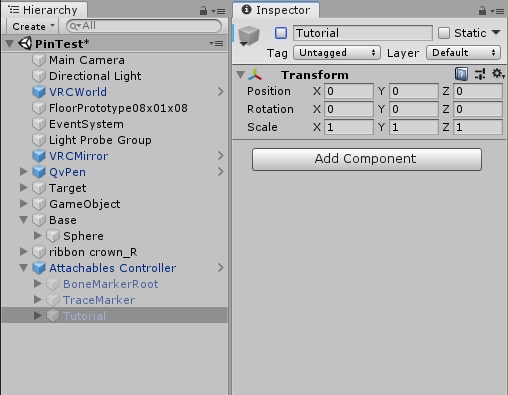
Attachables Controller
When you first create an attachable object, an "Attachables Controller" object will be automatically created at the root of your scene. You can move this object somewhere else in your Hierarchy, but please ensure that it remains active. If you accidentally delete the controller, simply change any setting on any prop's Attachable Config component to restore it.
Configuration options
- Bone selection radius: Sets the maximum distance from prop to bone for a bone to be considered a candidate for selection.
- Direction marker and directionality: Sets a preferred direction for attachment. See below for details.
- Disable finger bone tracking: When checked, the prop will not be attachable to fingers. Recommended for larger props, where placing them on fingers is unlikely and the finger selection might get in the way.
- Respawn time: When set, the prop will return to its starting location after the specified number of seconds has passed without being held or tracking a bone. Enter
0to disable this feature. The respawning is performed using local coordinates, so if the parent objects are moving this will result in the respawn point moving as well. - Removal permissions: Selects which players can grab a prop that is attached to a player already. Useful for avoiding stealing props.
- Animator control: See below
Directionality
The Attachment Direction marker object is used to provide directionality to the bone selection system; this tends to make it much easier to select the right bone. The bone selection logic will prefer bones that are near the line formed by the Attachment Direction marker's local Z axis; for example, on a hat you might make the Z axis point down (towards the head it'll be attached to), or with a ring you'll point it through the middle of the ring (aligned with the finger it'll be on).
If you are making a prop which is perfectly symmetric and has no preferred direction, set the directionality attribute on the parent object to zero to disable this logic.
Animator control
Attachables can signal an animator to respond to the state of the attachment. Set the "Animator to control" parameter to the animator component to control. The flag parameter names refer to boolean animator variables which will be set in various states.
In-world tutorial
By default, tutorial guidance will be shown the first time a user picks up a prop, or (if in VR) places their hand near a tracking prop after entering the world. They will go away once the user performs each of the three major interactions supported by the system (bone selection, player selection, and pickup).
These popups help guide the user to the various interactions supported by the AttachToMe system; however, if this is undesired, these can be disabled by setting the Tutorial object under the "Attachables Controller" prefab to be inactive.
Troubleshooting
When props are disabled and enabled, they do not respond to any input (without error logs)
Please make sure you are not setting the props to be inactive immediately after scene load. Due to an outstanding Udon bug, marking an object inactive in the same frame as its UdonBehaviours were scheduled to Start can result in the UdonBehaviours entering a broken state permanently. It is however safe if they are initially disabled (ie, already disabled in the editor).